Remember when we all went to the store to get film developed? We had to wait like 2 weeks for the chemical process to take the negatives, and we would just sit and wait and hope they would come out good? Those days are long past us. Since we all use digital cameras, and mobile devices to take photos now – where is the right place for them to be stored? You wouldn’t want to lose all those photos of your child’s first birthday would you?
In 2002, Apple introduced iPhoto. A simple app that would be the depository for all your photos. Even in 2002, it wasn’t that complicated. You would plug in your digital camera, import your photos and you were done. Now we all have multiple computers and mobile devices and our photos are scattered all over the place.
Since OS X 10.10.3 and iOS 8, Apple has done away with iPhoto in favor of their latest photo management tool Photos. To be less confusing for the rest of this post, we will call it Photos.app. Photos.app has one amazing feature — the ability to sync your ENTIRE photo library to all devices all the time. This is super handy as now I have photos that go back to the beginning of my digital time on my phone, when I used to only have the latest 1000 photos.
To enable all this – there are some iCloud settings we have to setup.
First on your computer:
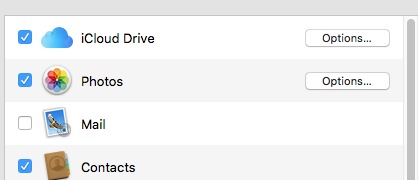
Go to the Menu and down to System Preferences. Choose iCloud. Make sure Photos is on.
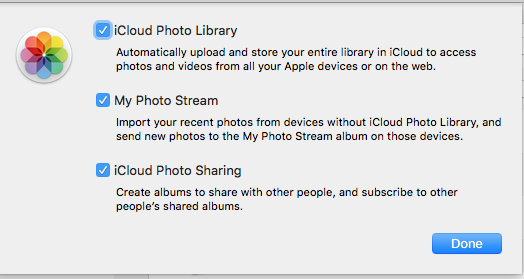
Click the Option button that’s on the right side, and make sure all the items in the drop down are checked on also.
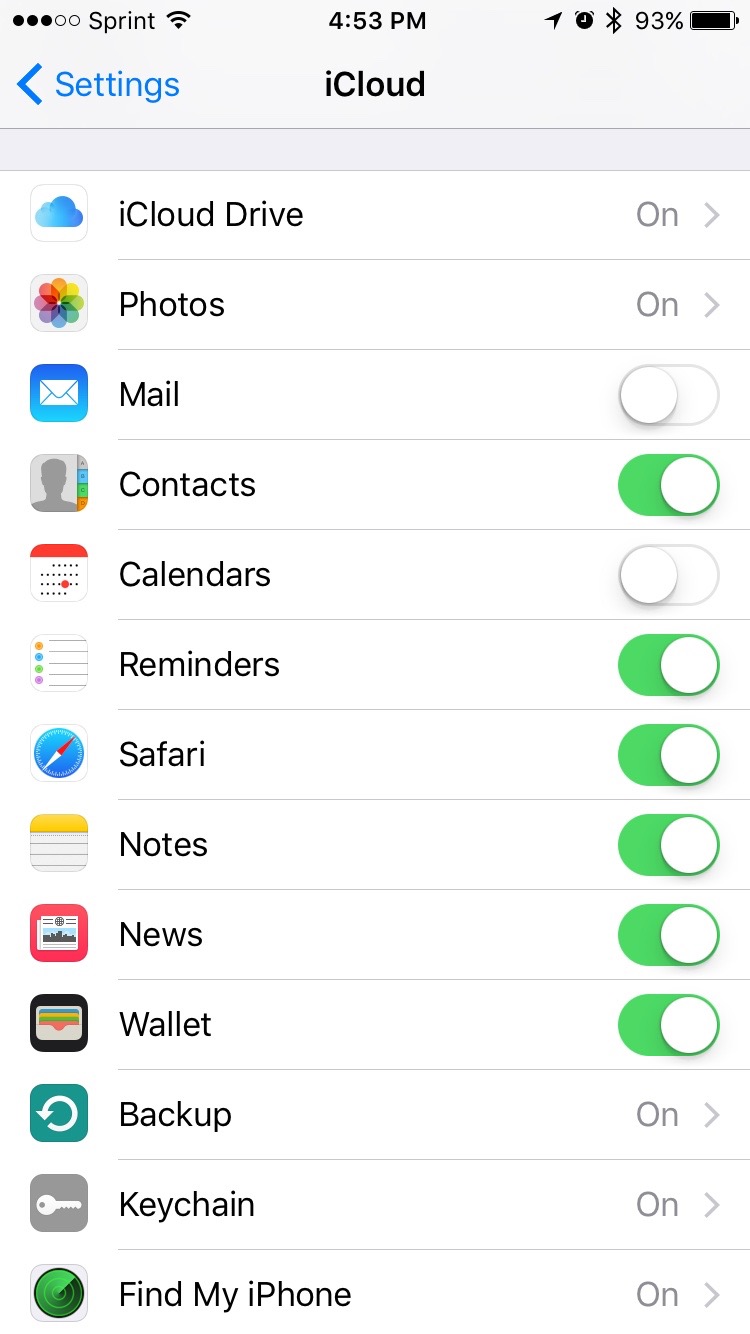
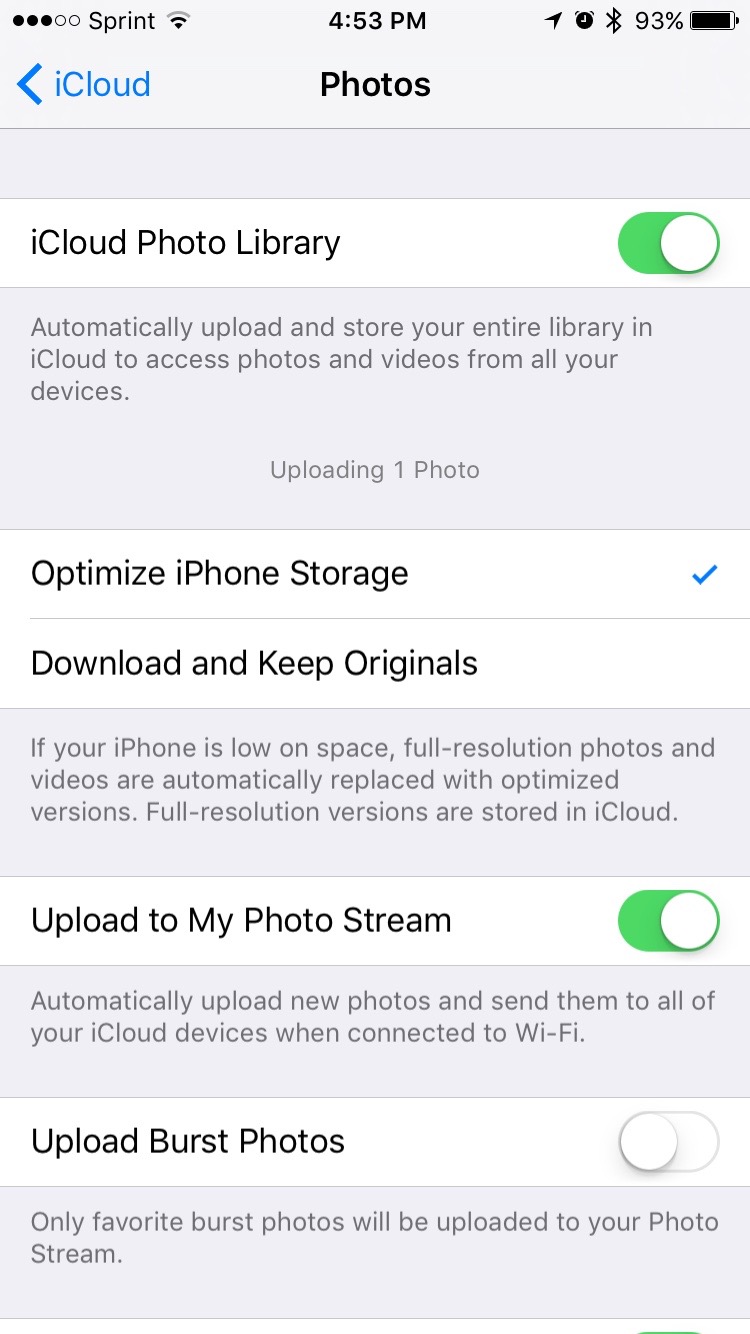
On your iOS device go to the Settings.app, and choose iCloud. Enable Photos:
When you tap it on, you are brought to a second screen. Enable all the options, and turn on Optimize [device] Storage (more on this in a bit).
Rinse, wash and repeat for all your other devices.
Now your computer and your devices are set. All your photos from the Photos.app on any device will be syncing to the cloud and merge with your other devices. When I say all your photos I do mean ALL your photos.
One downside to this new syncing tool is if you delete a photo from any of your devices, it deletes them from all devices. So before you delete anything, question if you really need it, or if you have a backup somewhere else. If you are worried about accidentally deleting your photos, make sure your computer at home has a backup setup. Apple is smart enough to put an album in called “Recently Deleted”. This album will hold recently deleted pictures and movies for up to 30 days.
Remember when we turned on Optimize [device] Storage? Using this, Photos.app will actually keep a low-res version of your photo on your phone, so it can show a thumbnail. When you click on the photo, the high res version is then downloaded. During the download you will see a little white timer on the bottom right corner. If your device is low on space it will return photos you haven’t looked at in some specific amount of time (we aren’t sure what that time amount is yet), and will “return” them to the cloud, leaving you just the low res version.
One thing to take into consideration with all of these photos (and movies), is the amount of cloud space you have. Apple sells additional iCloud space (of course they do), at 99¢/month for 20GB, $3.99/month for 200GB, $9.99/month for 500GB and $19.99/month for 1TB of space.
Let’s put some real world numbers to that. I personally have 12,812 photos and movies in my Photos.app on my computer. According to my phone, I have 158GB free from my 200GB plan. My photo library only takes up 35.7GB. Your mileage obviously may vary. Do you take a lot of movies with your phone? Are they longer than the movies I’m taking? Possibly. Take that into consideration when buying more space from Apple. You can always upgrade or downgrade your plan as time moves on.
Apple wants your entire digital life to be with you all the time. Why have a situation when you can’t show off your amazing photography skills at any given moment. Just follow the simple instructions and you now have your photo library on the go.
Need help making sure all your photos are syncing properly?


